Getting started
After installing Part-DB, you should begin with customizing the settings and setting up the basic structures. Before starting, it’s useful to read a bit about the concepts of Part-DB.
- Getting started
- Customize system settings
- Change password, Set up Two-Factor-Authentication & Customize User settings
- (Optional) Customize homepage banner
- Create groups, users and customize permissions
- Create Attachment types
- (Optional) Create Currencies
- (Optional) Create Measurement Units
- Create Categories
- (Optional) Create Footprints
- (Optional) Create Storage locations
- (Optional) Create Manufacturers and suppliers
- Create parts
Customize system settings
Before starting creating data structures, you should check the system settings to ensure that they fit your needs. After logging in as an administrator, you can find the settings in the sidebar under Tools -> System -> Settings. 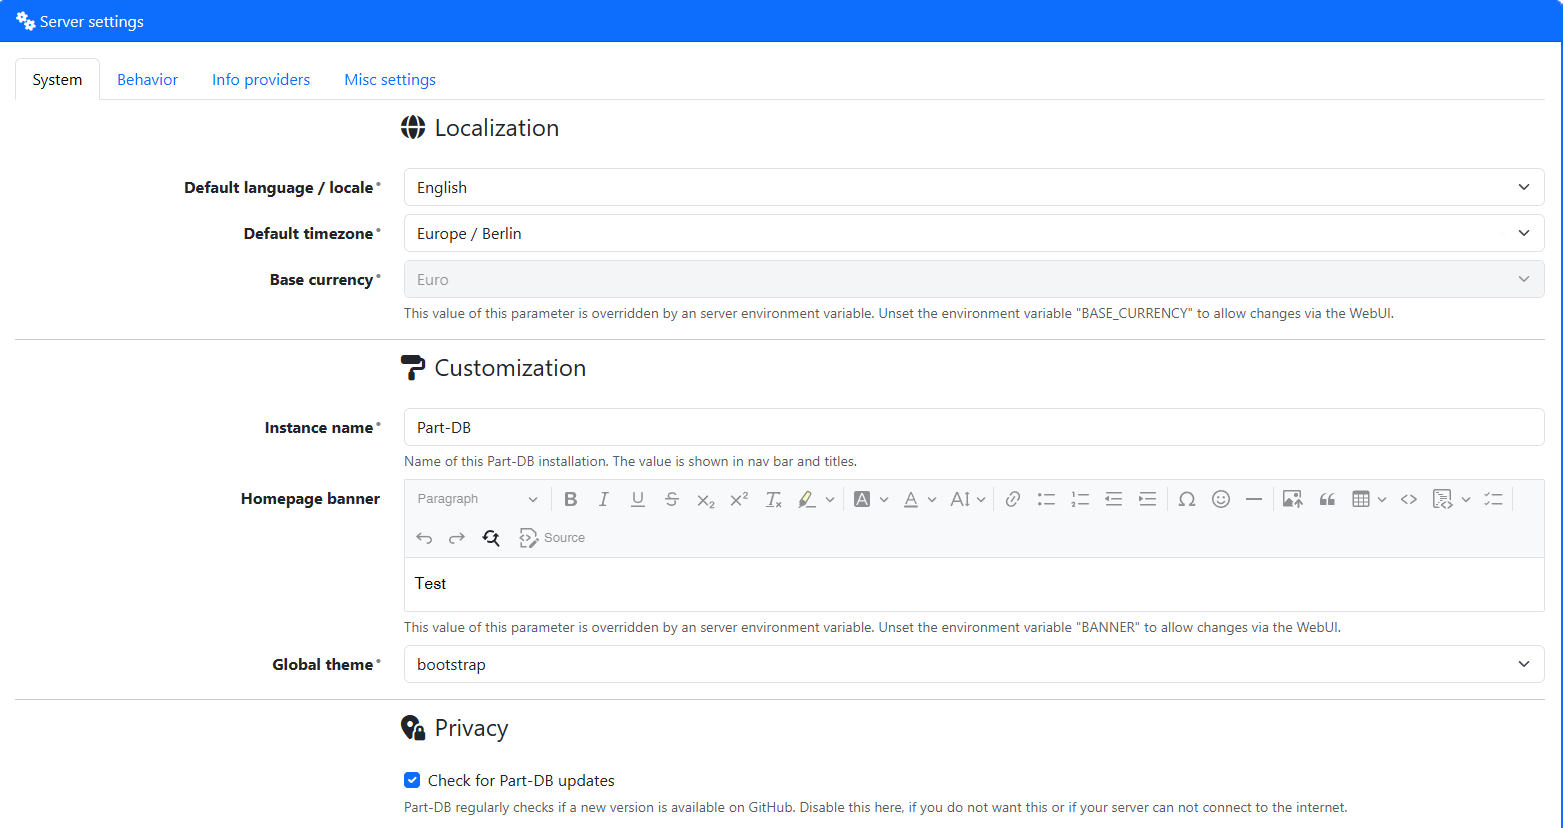
Here you can change various settings, like the name of your Part-DB instance (which is shown in the title bar of the browser), the default language (which is used if no user preference is set), the default timezone (which is used to display times correctly), the default currency (which is used to display prices correctly), and many more.
Some more fundamental settings like database connection, mail server settings, SSO, etc. are configured via environment variables. Environment variables also allow to overwrite various settings from the web interface. Environment variables can be changed by editing the .env.local file in a direct installation or by changing the env variables in your docker-compose.yaml file. A list of possible configuration options can be found here.
Change password, Set up Two-Factor-Authentication & Customize User settings
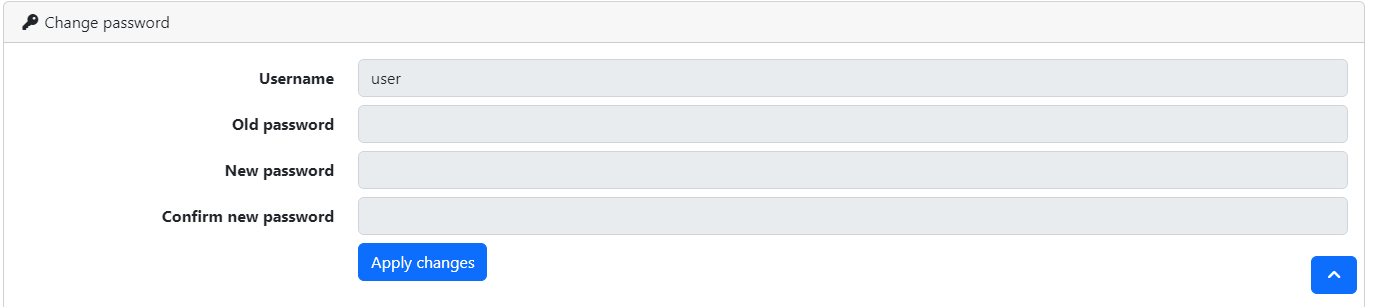
If you have not already done so, you should change your user password. You can do this in the user settings (available in the navigation bar drop-down with the user symbol).
There you can also find the option to set up Two-Factor Authentication methods like Google Authenticator. Using this is highly recommended (especially if you have admin permissions) to increase the security of your account. (Two-factor authentication can even be enforced for all members of a user group)
In the user settings panel, you can change account info like your username, your first and last name (which will be shown alongside your username to identify you better), department information, and your email address. The email address is used to send password reset mails if your system is configured to use this.
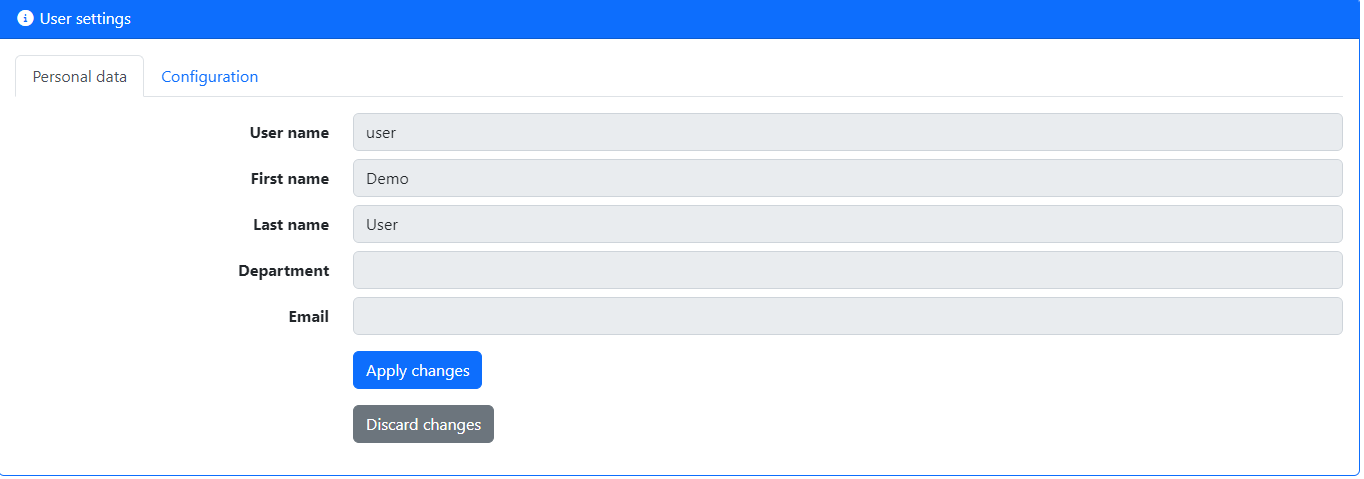
In the configuration tab you can also override global settings, like your preferred UI language (which will automatically be applied after login), the timezone you are in (and in which times will be shown for you), your preferred currency (all money values will be shown converted to this to you, if possible) and the theme that should be used.
(Optional) Customize homepage banner
The banner which is shown on the homepage, can be customized/changed via the homepage banner setting in system settings. You can use markdown and (safe) HTML here, to style and customize the banner. You can even use LaTeX-style equations by wrapping the expressions into $ (like $E=mc^2$, which is rendered inline: $E=mc^2$) or $$ (like $$E=mc^2$$) which will be rendered as a block, like so: \(E=mc^2\)
Create groups, users and customize permissions
Users
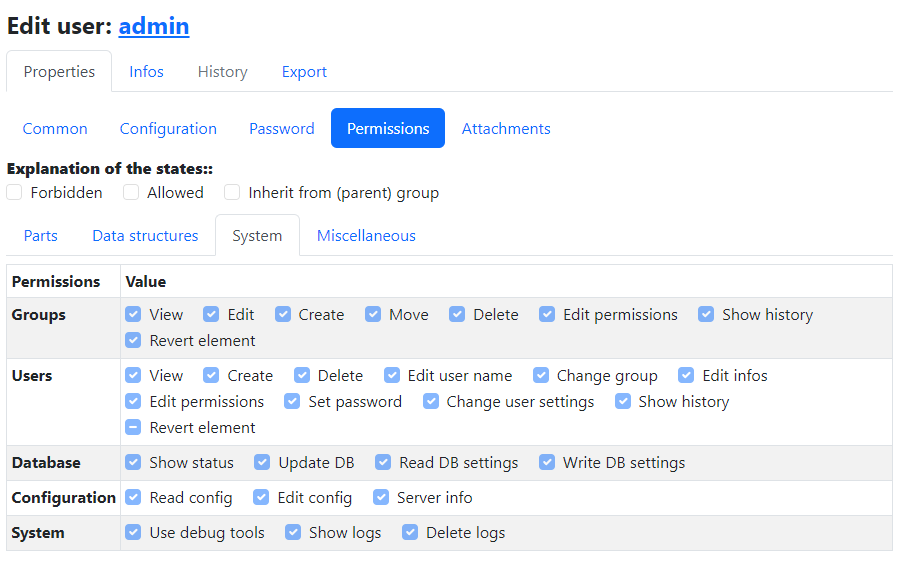
When logged in as administrator, you can open the users menu in the Tools section of the sidebar under System -> Users. On this page you can create new users, change their passwords and settings, and change their permissions. For each user who should use Part-DB, you should set up their own account so that tracking of what each user did works properly. 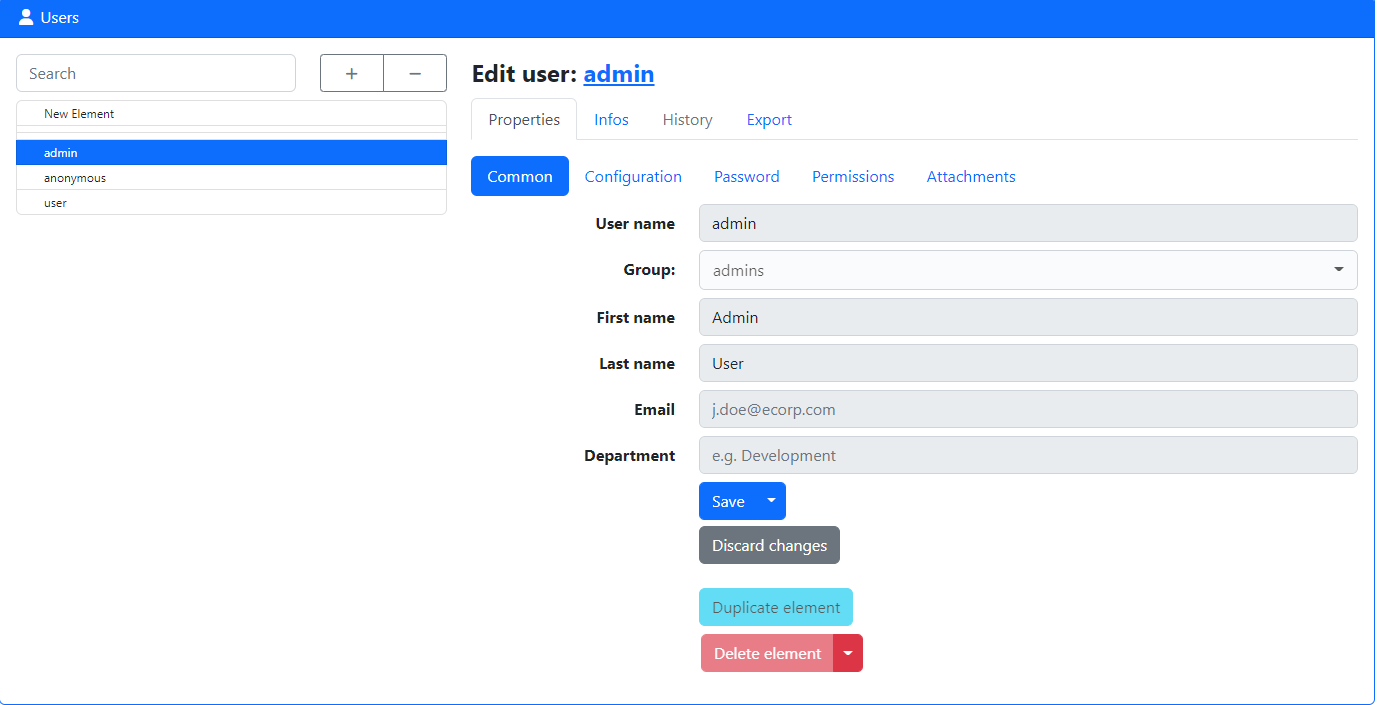
You should check the permissions for every user and ensure that they are in the intended way, and no user has more permissions than he needs. For each capability, you can choose between allow, forbid, and inherit. In the last case, the permission is determined by the group a user has (if no group is chosen, it equals forbid)
Anonymous user
The anonymous user is special, as its settings and permissions are used for everybody who is not logged in. By default, the anonymous user has read capabilities for your parts. If your Part-DB instance is publicly available you maybe want to restrict the permissions.
Groups
If you have many users who should share the same permissions, it is useful to define the permissions using user groups, which you can create and edit in the System -> Groups menu.
By default, 3 groups are defined:
readonlywhich users only have read permissions (like viewing, searching parts, attachments, etc.)userswhich users also have rights to edit/delete/create elementsadminwhich users can do administrative operations (like creating new users, showing global system log, etc.)
Users only use the setting of a capability from a group, if the user has a group associated and the capability on the user is set to inherit (which is the default if creating a new user). You can override the permissions settings of a group per user by explicitly setting the permission of the user.
Groups are organized as trees, meaning a group can have parent and child permissions and child groups can inherit permissions from their parents. To inherit the permissions from a parent group set the capability to inherit, otherwise, set it explicitly to override the parents’ permission.
Create Attachment types
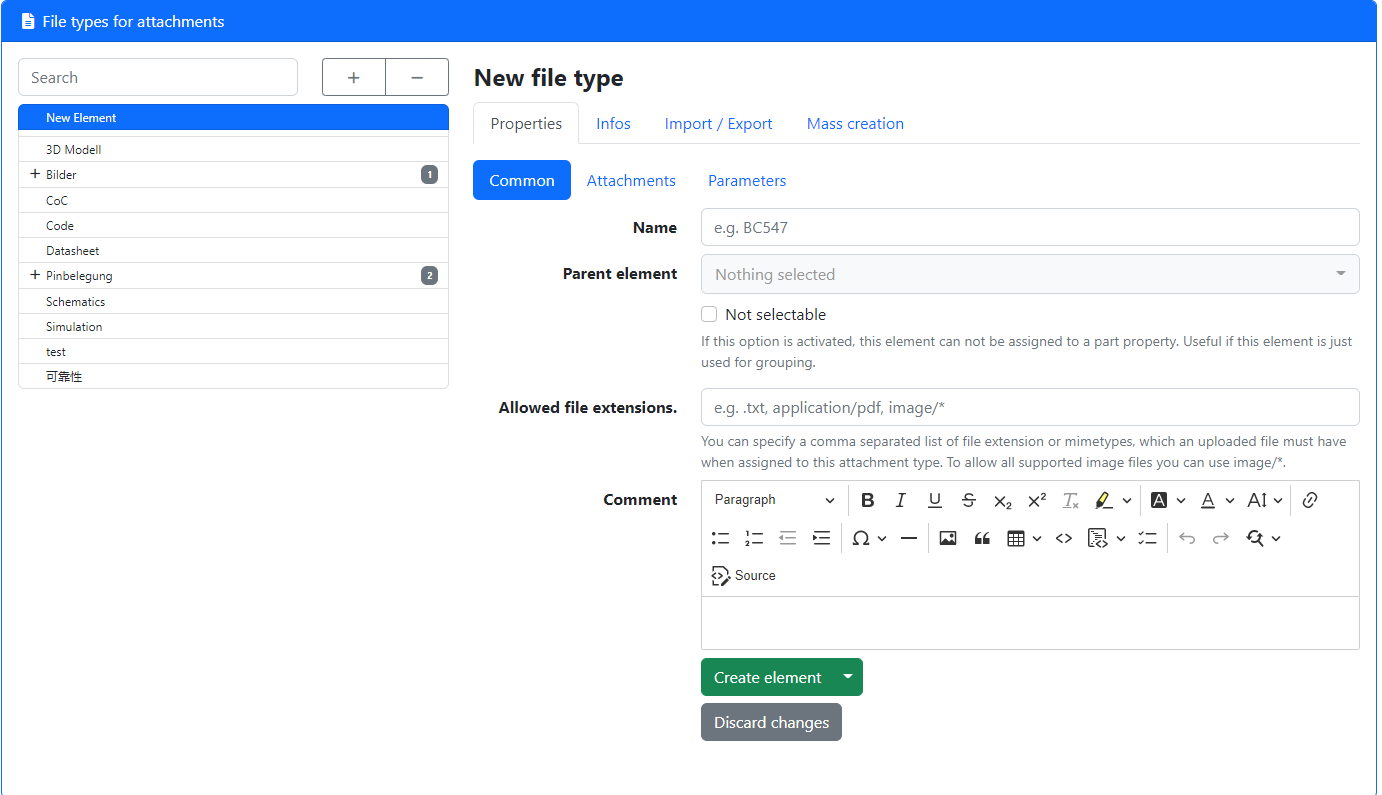
Every attachment (that is a file associated with a part, data structure, etc.) must have an attachment type. They can be used to group attachments logically, like differentiating between datasheets, pictures, and other documents.
You can create/edit attachment types in the tools sidebar under “Edit -> Attachment types”:
Depending on your use case different entries here make sense. For part management the following (additional) entries may make sense:
- Datasheets (restricted to pdfs, Allowed filetypes:
application/pdf) - Pictures (for generic pictures of components, storage locations, etc., Allowed filetypes:
image/*
For every attachment type a list of allowed file types, which can be uploaded to an attachment with this attachment type, can be defined. You can either pass a list of allowed file extensions (e.g. .pdf, .zip, .docx) and/or a list of Mime Types (e.g. application/pdf, image/jpeg) or a combination of both here. To allow all browser-supported images, you can use image/* wildcard here.
(Optional) Create Currencies
If you want to save price information for parts in a currency different from your global currency (by default Euro), you have to define the additional currencies you want to use under Edit -> Currencies:
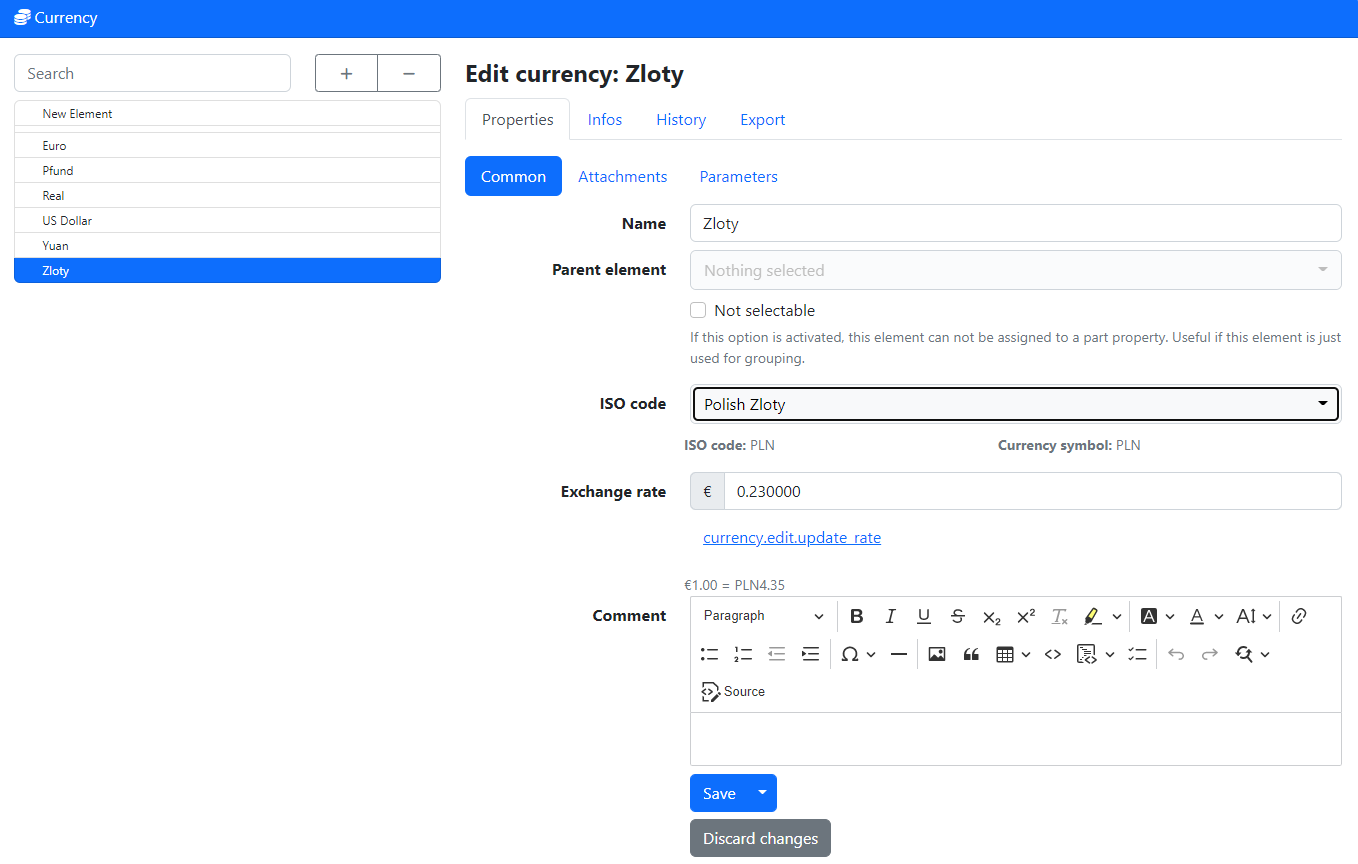
You create a new currency, name it however you want (it is recommended to use the official name of the currency), select the currency ISO code from the list, and save it. The currency symbol is determined automatically from the chosen ISO code. You can define an exchange rate in terms of your base currency (e.g. how many euros is one unit of your currency worth) to convert the currency values in your preferred display currency automatically.
(Optional) Create Measurement Units
By default, Part-DB assumes that the parts in inventory can be counted by individual indivisible pieces, like LEDs in a box or books on a shelf. However, if you want to manage things, that are divisible and the stock is described by a physical quantity, like length for cables, or volumes of a liquid, you have to define additional measurement units.
This is possible under Edit -> Measurement Units: 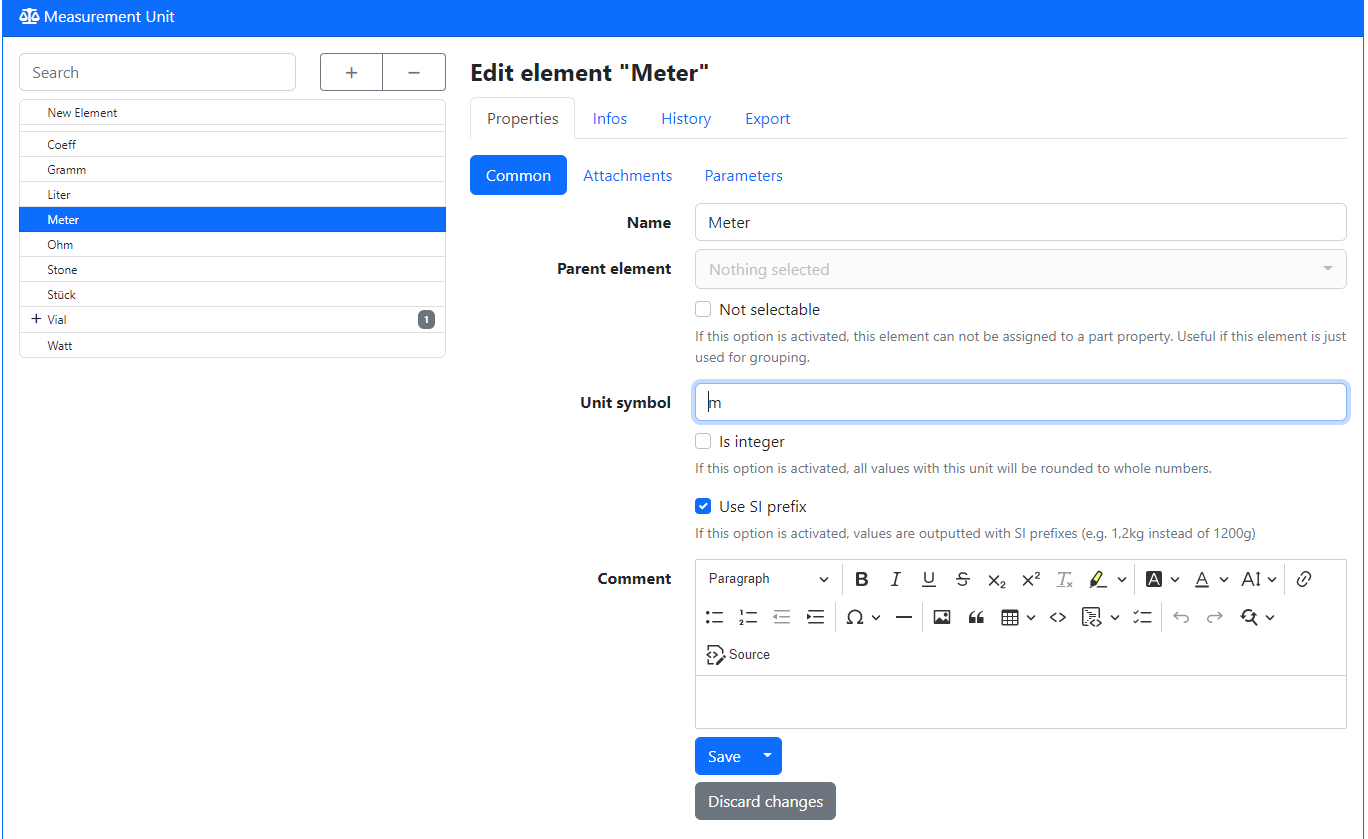
You can give the measurement unit a name and an optional unit symbol (like m for meters) which is shown when quantities in this unit are displayed. The option Use SI prefix is useful for almost all physical quantities, as big and small numbers are automatically formatted with SI prefixes (like 1.5kg instead 1500 grams).
The measurement unit can be selected for each part individually, by setting the option in the advanced tab of a part`s edit menu.
Create Categories
A category is used to group parts logically by their function (e.g. all NPN transistors would be put in a “ NPN-Transistors” category). Categories are hierarchical structures meaning that you can create logical trees to group categories together. See Concepts for an example tree structure.
Creating/Editing categories is done in the tools sidebar under “Edit -> Categories”.
Every part has to be assigned to a category, so you should create at least one category before you start adding parts.
(Optional) Create Footprints
Footprints are used to describe the physical shape of a part, like a resistor or a capacitor. They can be used to group parts by their physical shape and to find parts within the same package.
You can create/edit footprints in the tools sidebar under “Edit -> Footprints”.
It is useful to create footprints for the most common packages, like SMD resistors, capacitors, etc. to make it easier to find parts with the same footprint. You should create these as a tree structure so that you can group footprints by their type. See Concepts for an example tree structure.
You can define attachments here which are associated with the footprint. The attachment set as the preview image, will be used whenever a visual representation of the footprint is needed (e.g. in the part list).
For many common footprints, you can use the built-in footprints, which can be found in the “Builtin footprint image gallery”, which you can find in the “tools” menu. Type the name of the image you want to use in the URL field of the attachment and select the image from the dropdown menu.
(Optional) Create Storage locations
A storage location represents a place where parts can be stored.
You can create/edit storage locations in the tools sidebar under “Edit -> Storage locations”.
(Optional) Create Manufacturers and suppliers
You can create/edit manufacturers and suppliers in the tools sidebar under “Edit -> Manufacturers” and “Edit -> Suppliers”.
Create parts
You are now ready to create your first part. You can do this by clicking either by clicking “Edit -> New Part” in the tools sidebar tree or by clicking the “Create new Part” above the (empty) part list, after clicking on one of your newly created categories.
You will be presented with a form where you can enter the basic information about your part:
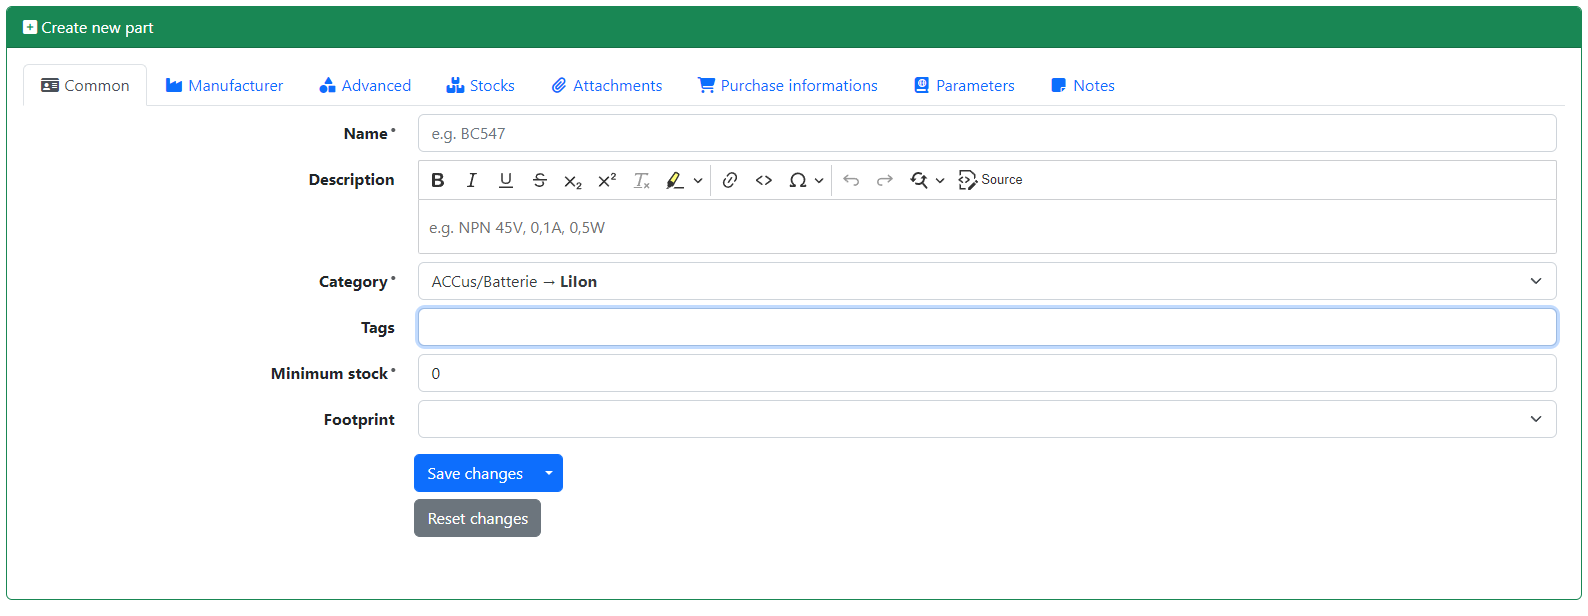
You have to enter at least a name for the part and choose a category for it, the other fields are optional. However, it is recommended to fill out as much information as possible, as this will make it easier to find the part later.
You can choose from your created data structures to add manufacturer information, supplier information, etc. to the part. You can also create new data structures on the fly if you want to add additional information to the part, by typing the name of the new data structure in the field and selecting the “New …” option in the dropdown menu. See tips for more information.